Managing content for a JAMstack site with Netlify CMS
Content for the modern web development architecture:
Headless CMS = Content Management System for JAMstack sites
This blog post covers:
Netlify CMS for a JAMstack site built with Hugo + jQuery + Azure Functions
This blog post is part of a series:
- Building a JAMstack site with Hugo and Azure Functions
- Managing content for a JAMstack site with Netlify CMS (this post)
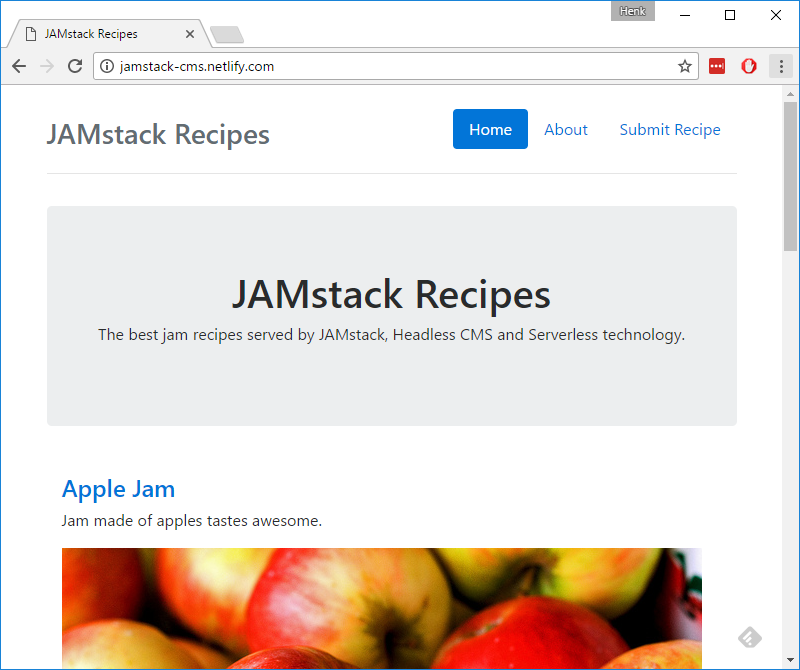
The example used in this blog post is a site for jam recipes.
Example code:
Example site:
JAMstack
JAMstack is the modern web development architecture based on client-side JavaScript, reusable APIs, and prebuilt Markup. The previous blog post covered how to build a JAMstack site with Hugo and Azure Functions. This post will focus on how to add a Headless CMS to manage the content for the site.
Headless CMS
A Headless CMS gives non-technical users a simple way to add and edit the content of a JAMstack site. By being headless, it decouples the content from the presentation.
A headless CMS doesn’t care where it’s serving its content to. It’s no longer attached to the frontend, and the content can be viewed on any platform.
Read all about it over at: https://headlesscms.org
A Headless CMS can be:
- Git-based
- API-driven
In this blog post the focus is on Netlify CMS, an open source, Git-based CMS for all static site generators.
With a git-based CMS you are pushing changes to git that then triggers a new build of your site.
Netlify CMS
An open-source CMS for your Git workflow
Find out more at:
Why Netlify CMS?
- Integrates with any build tool
- Plugs in to any static site generator
Setup
You can follow the Quick Start to install and configure Netlify CMS.
Basically do five things:
- Sign up for Netlify:
- New site from Git
- Register a new OAuth application in GitHub
- Install authentication provider
- Update the code
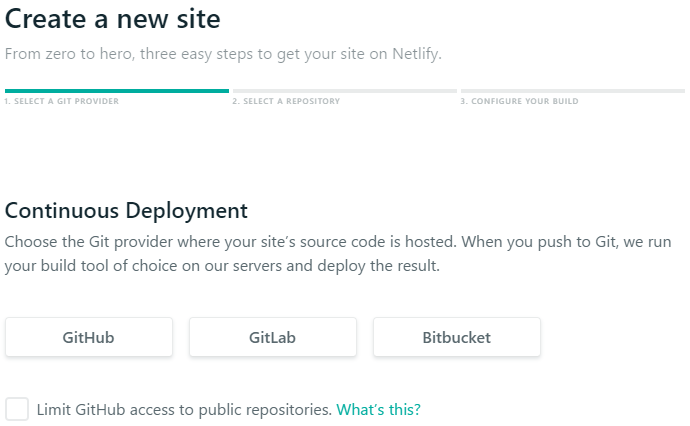
New site from Git
Go here:
Then:
- Select a git provider
- Select a repository
- Configure your build
The build configuration for this site:
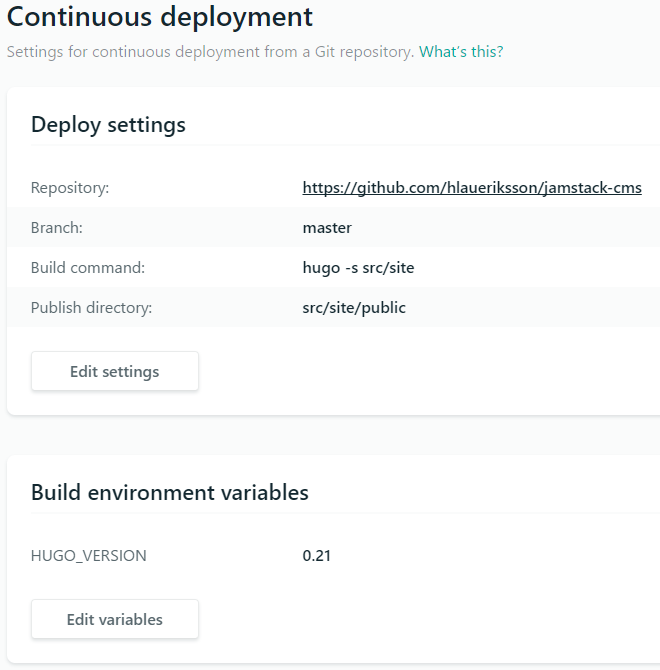
- Build command:
hugo -s src/site - Publish directory:
src/site/public - Build environment variables:
HUGO_VERSION = 0.21
Refer to Common configuration directives when configuring other static site generators.
Register a new OAuth application in GitHub
Go here:
Then:
- Register a new OAuth application

- Authorization callback URL:
https://api.netlify.com/auth/done
Take note of:
Client IDClient Secret
Install authentication provider
Go here:
Then:
<Site>/ Access / Authentication providers / Install provider
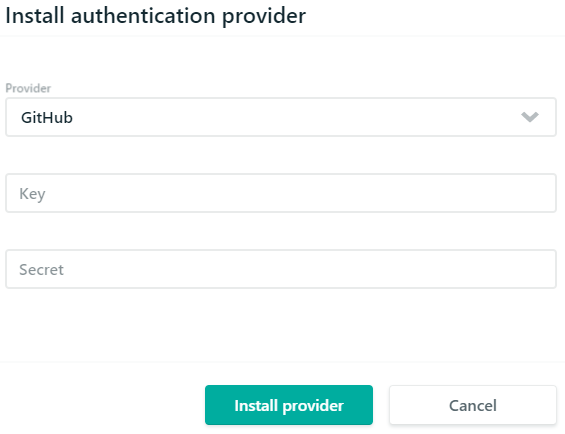
Copy from GitHub:
- Key:
Client ID - Secret:
Client Secret
Code
The code for the site:
The source code in this example is a clone of the Git repository from the previous blog post.
Some code has changed:
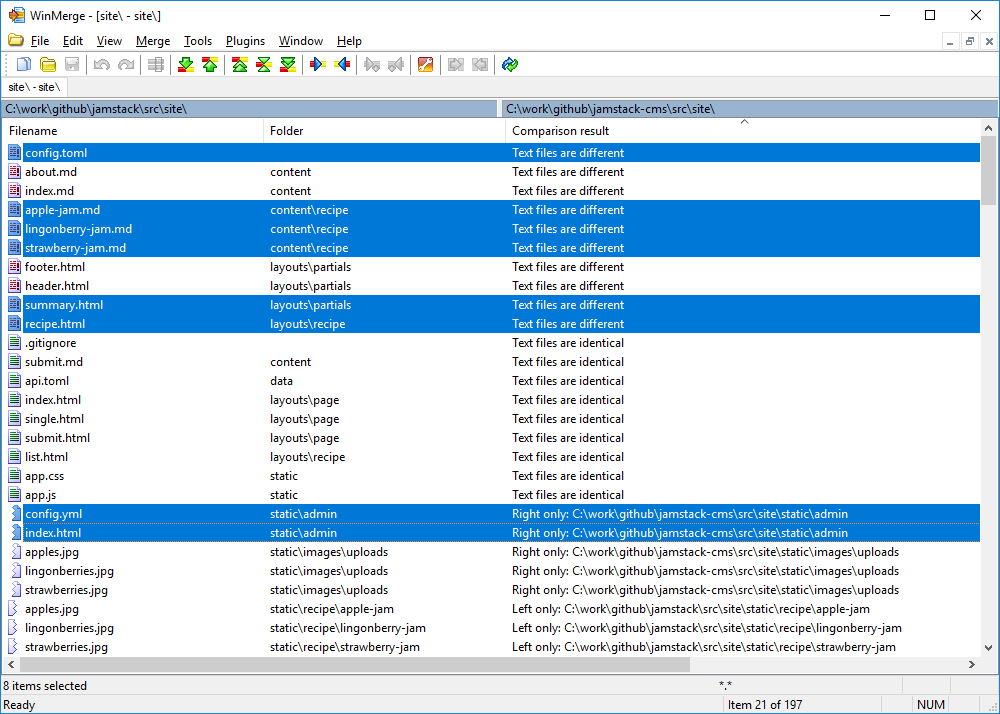
Let’s talk about the highlighted files…
To add Netlify CMS to a Hugo site, two files should be added to the /static/admin/ folder:
index.htmlconfig.yml
index.html:
- Entry point for the Netlify CMS admin interface
- Scripts and styles from CDN
- This is a React app
- This is version
0.4
config.yml:
- The backend is the GitHub repo
- The media and public folders suitable for Hugo. Images can be uploaded directly from the editor.
- Collections define the structure for content types and how the admin interface in Netlify CMS should work
- One content type for recipes is configured in this example
- The
fieldscorrespond to theyaml-formatted front matter in the generated markdown files - The last field,
body, is the content in generated markdown files - You can enable the Editorial Workflow here
Content:
- The content type from the
config.ymlgenerates markdown files like this - The
yaml-formatted front matter correspond to thefields - The
bodyfield is the actual content
The following files needed to be modified to support the new site and the markdown files generated by the Netlify CMS.
config.toml:
- The
baseURLpoints to the new site hosted by Netlify
summary.html:
- Images can be uploaded directly from the editor to a dedicated folder in the Git repo
- The full URL to the image comes from the front matter
recipe.html:
- The URL to the image was changed here too
- Front matter formatted with
yamlandtomlhas a slightly different structure - Access to the values of ingredients was changed
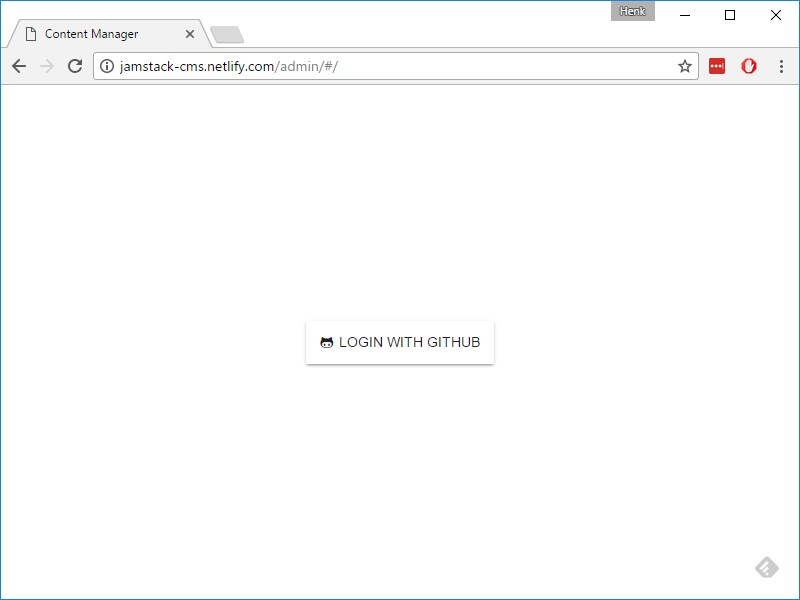
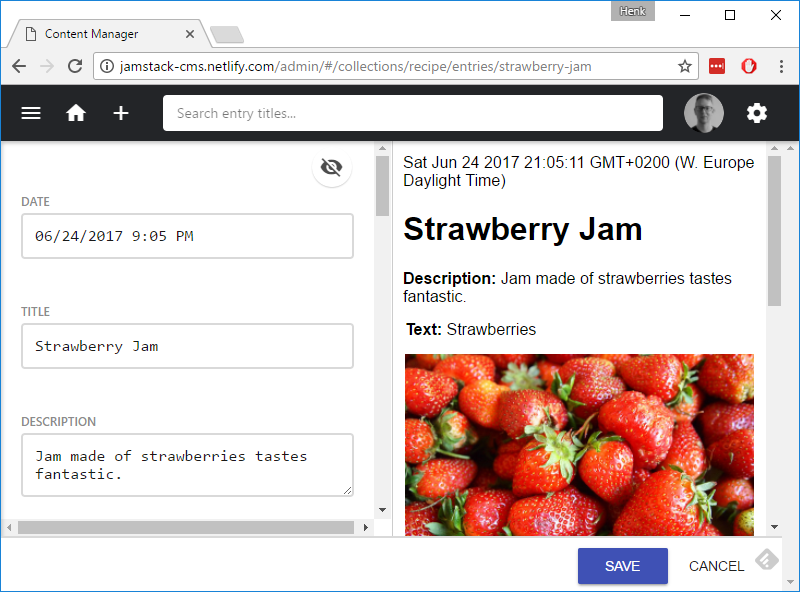
Content Manager
The Netlify CMS admin interface is accessed via the /admin/ slug.
If you are a collaborator on the GitHub repo you can log in:
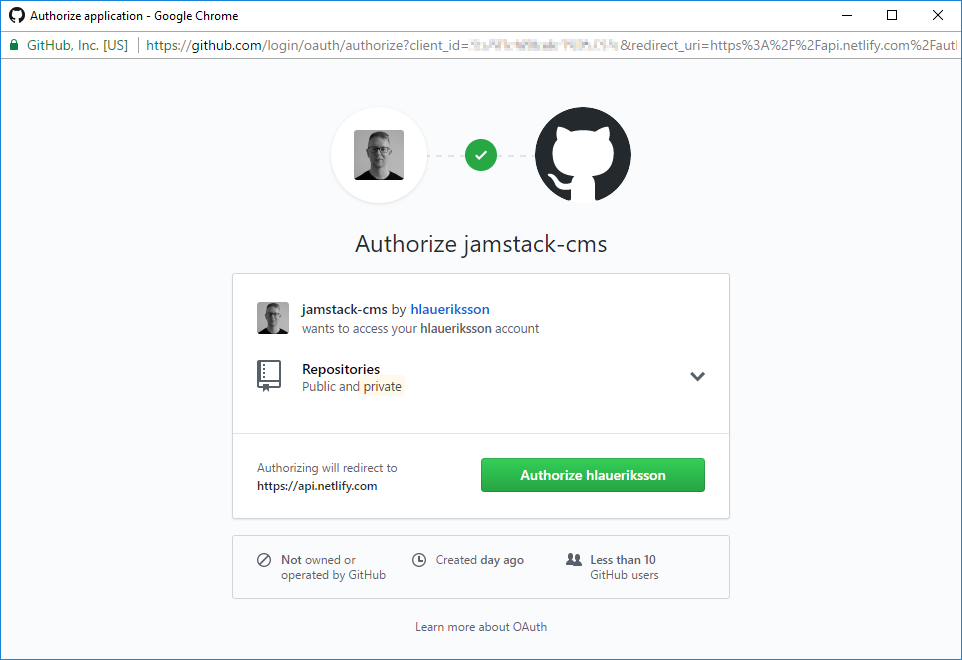
After you authorize the application:
You can view the content from the repo:
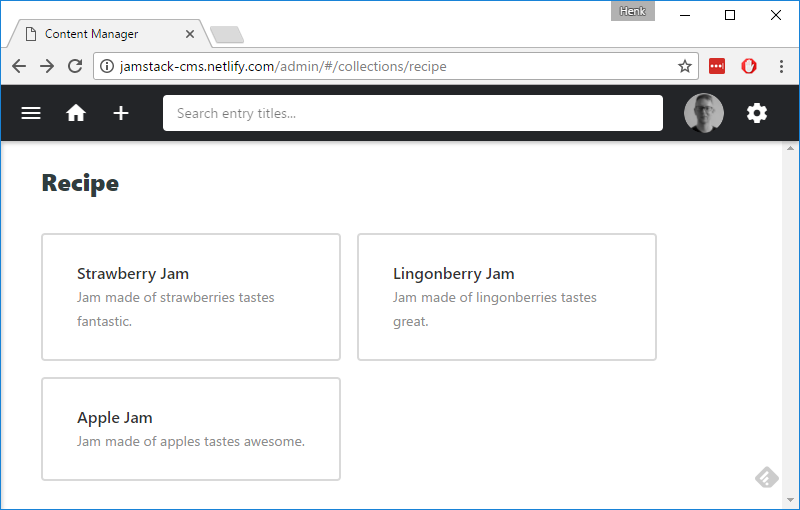
Add and edit the content from the repo:
Conclusion
JAMstack sites are awesome. Headless CMSs adds even more awesomeness.
Smashing Magazine just got 10x faster by using Hugo and Netlify CMS to move from a WordPress to a JAMstack site.